Distinctions among Transfer Methods
Providers of film transfers will make use of a wide range of technology and may charge a correspondingly wide range of prices for their services. You can learn about the specific equipment each provider uses on their own web-pages and promotional materials. Here are some topics worth knowing about.
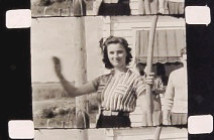
1 “Off-the-Wall” Transfer : Anyone in possession of a working film projector can achieve a “quick and dirty” digital transfer of a film by simply projecting it onto a screen (or wall) and filming the show with a digital camera mounted on a tripod. Image quality may be compromised by factors such as the color and texture of the projection surface, the projector’s light and lens quality and speed setting, the angle of the camera to the screen. So long as the projector is clean and in good working order, and the film is not significantly shrunken or damaged, this can be an efficient method of capturing a preliminary record of your films for the purpose of identifying subject matter, placing reels in order, and determining the preservation value of the material.
2 Modified Projector Units / ‘Claw’ pull-down: With the advent of small, high-quality digital cameras, re-purposed film projectors have been fitted out with digital video cameras mounted in front of the lens to capture the imagery directly off of the film. Since the lighted image travels through fewer lenses and surfaces before being recorded, image quality is generally superior to the “off-the-wall” approach. The resulting image quality can vary depending on camera and lens quality, uniformity and color of the light source, and operator skill. Modified projectors – and some lower-end scanners — use the traditional projector “pull down claw” to move the film through the gate by pulling down on the perforations at the edge of the film. While this technology works perfectly well when a machine is properly maintained, film that is warped or shrunken can be damaged if the claw does not engage the film precisely enough.
3 Traditional Telecine: Although the word “telecine” is often used generically to refer to any film-transfer process, it more particularly denotes the conversion of film images to a video signal for viewing or broadcast on videotape. Most commonly for home movies, a telecine unit such as the popular ELMO transfer units might be used to transfer 8mm or 16mm films to a VHS tape. Because of the differences in frame rates between film projection, which is really a succession of still images flashed on a screen (like a “flip book”), and video, which renders images in interlaced fields of horizontal lines, telecine electronically blends together neighboring frames (which is why when you paused a VHS tape, you didn’t get a nice clear single image like you do today when you pause a streaming movie). With today’s overwhelming popularity of digital media, transferring original film to video files is rarely required.
4 Film Scanners: Scanners, in contrast to the traditional telecine approach, are designed to capture each frame of a film as a discrete digital image. The individual image files are stored on a computer heard drive, where they can be converted into a variety of digital codecs (.avi, .mpeg, etc.) for storage on a DVD or hard drive and viewed on monitors or televisions. Scanners typically capture image information at higher resolutions than less expensive units equipped with digital camera, and therefore the scanning process takes longer — and costs more. “Hi Definition” scans at 2K or even 4K resolution are often desired by media producers, particularly for release on Blu-ray devices — but opinions differ as to whether the small 8mm image frame, or even the 16mm film gauge, benefits form this degree of resolution.
5 Sprocketless Drives: Many of the more advanced film scanners have replaced the potentially damaging ‘Claw pull-down’ with sprocket less drive mechanisms that are more gentle on film. In this system, the film is moved over smooth, flat rollers as it makes its way through the machinery, avoiding the possibility of mechanically puncturing the film. If your film is exhibiting substantial warping or shrinkage, a sprocketless drive will likely be the only option for transferring your films.
Film Cleaning / Handling: Depending on your films have been stored and cared for, they may be dirty or dusty and benefit from cleaning prior to transfer. Carefully winding through the film while passing it through a velvet cloth treated with a film cleaning liquid can remove light particulate matter, while more focused effort is required for removing tape residue, oil, or mold. Some labs have access to elaborate film cleaners that pass the entire film through a liquid chamber and gently bombard the first from the film with ultra-sonic waves. If your film was edited together with many splices, cleaning can be more difficult, and the splices may need to be reinforced with fresh tape. Also, many labs may want to “build up” your many small reels of film onto larger reels for transfer. Make sure that you discuss the importance of retaining information from your film containers and keeping track of the order and identity of your various film reels.